Friday, December 28, 2012

Just Playing

Most of my Christmas shopping is now done online as we have very few significant shops in our area. However, on my recent day trip to Granada I saw a jumper that I knew my husband would like. I was toying with the idea of buying it when a crafting friend who was with me said "Go on Kate. It's worth it just for the tag". 
What tag was that? Well here it is. This cute little chipboard reindeer was tied to the label in the neck of the jumper, so I bought it. I'm pleased to say the jumper was a hit, and I got to keep the tag!


So today I decided to have a play. I started by scanning the tag into my computer and then I used a combination of my photo editor, (Corel PSP) and windows Paint, to make a black and white image. Then I took this into my Silhouette cameo machine and made a cutting file. To start with I made it a good size and cut it out of some backing paper from my snippets box.


Next I used the Silhouette Studio software to put the image into a frame, resized it and cut it out. I mounted it onto another snippet of pale blue and gold paper.


I also found, when I was clearing up the wrapping paper, that there was a kraft-paper band around the jumper that had further reindeer on it.


I couldn't let that go to waste so I cut the seven images out using a variety of dies, and distressed the edges with fired brick DI. These will make useful little embellishments on next year's cards!


I then gave this image the same treatment as the larger one, making another cutting file which I tried out on the remaining printed paper scraps. I kept it small but the cutting files are easily resized to whatever is needed for a project.

I felt there was still some more mileage in my little reindeer, so I took a sheet of thin plastic that I had rescued this morning when Chris was tidying out his office and had thrown out a wallet-folder with a broken catch. The inner pockets were all made of thin, pliable plastic so I cut them all away. I wasn't sure whether it would cut with my silhouette, but after a couple of tests, and adjustments to the settings, I had it cutting fine. So I then cut out stencils of my reindeer and tried them out on some white paper, sponging them with tea-dye and vintage photo DIs. Of course I also have the 'positive' cut images which could have ink sponged around them, or be used as masks with spray inks, but I haven't got around to trying that yet.


My next idea was to print out a negative of each image onto very thin paper and I used these to make polymer stamps using my Imagepac. These won't get a lot of use, but I think the tiny pair will again be good for making more of the little die-cut embellishments, when I have used all the originals
Of course I also have a digi stamp of each image from the original project and these can be resized so in some ways are more useful, but as I like to colour my images I also spent ages making an outline version of the larger one. It's a bit shakey, but usable I think.


I still felt I could do more, so I played around with the images in my silhouette, resizing them and flipping some of them, and I also introduced an image of a female deer that was already stored in the silhouette library, and I made this border. I also made a border of cut grass by flipping and merging repeat images of one grass tuft that I had. I cut both borders from the plastic and sponged ink through to make this. It could be re-cut in other sizes to fit along a DL card or even a scrapbook page.


So I think I got good value from my reindeer tag. Sometimes it's good to just play!!

Thursday, December 27, 2012


Wishing all my followers, and blogland friends a
Very Happy Christmas
 and may Peace, Love and Joy, fill your lives throughout the coming year.
(This greeting will stay at the top of my blog until after Christmas. Please see below for any newer posts).

My favourite Christmas cards challenge


On my friend Di's blog I read about Debby's Challenge to highlight our favourite five Christmas cards that we made in 2012, so I thought I'd have a go. You can read about the challenge here.

So here is my first choice, and it was one of the first cards made this year. You can find the post for it here. I liked the image which I bought in a post Christmas 2011 sale, and it was a delight to colour with my copic pens.
Then, in no particular order, here are my other four choices.


This one was unusual for me as I don't often use monochrome, but at least I used green rather black, and white. You can read about it here.

I like this one because for me it sums up all that is important about Christmas. It was fun to make using my Silhouette cameo machine. Here is the post about it.
I made this one in a last minute rush when I realised that I was still a few short of my target, and as so often happens in such cases, it turned out better than others that I spent more time over. The post about this one is here.
And finally, here is one of a set I made with  a newly purchased Indigo Blu stamp. It stamped perfectly, was quick and easy to make, and worked in every colour combination. I like it for it's simplicity, and it also uses one of my oldest and best loved sentiment stamps.
Now I am off to link this to Debby's site. Why not pop over there and join in the fun. She is showcasing her own favourites so there is some great inspiration, and also offering Christmas candy for this challenge.

Thursday, December 20, 2012

One last Christmas card

I decided to post about one last Christmas card though it is one I made a month or so ago. I sent it to my sister Jean who follows this blog so I waited until I knew she had received it, before showing it on here.

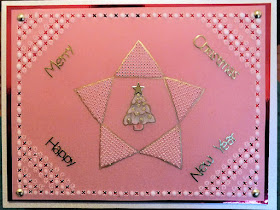
As you can see it is another piece of parchment craft, and I was fairly pleased with it as it was the first time I had tackled a proper project from a magazine without any help or advice from my teacher. (I am afraid it hasn't photographed very well, but you can get a rough idea of what it looked like).


Once I had traced the frame to the centre panel I coloured the holly leaves and berries with coloursoft pencils and then filled the centre with embossing using a grid. I stippled the frame to whiten it and then pricked around it and used snips to cut it out. 

The bell was made separately with all the white lines being traced and embossed, and then the various sections were filled with different grid patterns. Once it was cut out, I mounted it onto the main panel, but it looked rather insipid, so I decided to cut a matching bell from green card to go under it. A green organza bow covered the glue dot I used to attach it to the card.

The base card was embossed with my new A4 size embossing folder that came with my eBosser machine. I glued the panel to the card in the area hidden by the bell, and tied a matching ribbon around the left hand side.

I love the look of the parchment work but it is too time consuming, and too hard on my hands and eyes, to use very often, so I will have to reserve it for cards for very 'special' people!

Tuesday, December 11, 2012

Taking a break from Christmas

Well, what with the baking marathon last week, trying to put up the decorations (finished this afternoon), getting my cards posted to UK (done yesterday), Cantante choir concerts (2 down and 4 to go), and our local arts and craft expo (last weekend), I didn't even manage my favourite weekly visit around the crafting spaces  of my many friends at WOYWW. Unfortunately I won't be around tomorrow either as our Wednesday sewing group have their annual day out in Granada city. So I'll be on the coach at 8.00 tomorrow morning and won't be home until at least 10.00 at night. I'll be on my knees by then, but it is always a good day out. So I decided a quick blog was in order tonight and I am showing a birthday card I made for one of my sisters for last week. It was really our project piece for our last parchment class of the year. 
We started off by 'dorsing' a green area in the centre on the back of the parchment with oil pastels, and then placed the paper over a picture of a poppy and coloured it (without and outline) on the front, using blendable pencils. I have a lovely set of Derwent coloursoft which I bought with my prize money for the poppy ATC in my right side bar,  and I am quite pleased with them.
Once the picture was done we pricked the border which was a bit risky as one mistake can ruin the whole project. I was doing very well, but it is a long tiring day at the class, and just at the end I made a small mistake, which I was very cross about. 
Back at home I used four mini glue dots in the corners to attach my parchment to the front of a pretty pale green card and hid the glue under orange/red card candy. Fortunately I could also hide my pricking mistake under a floppy green bow! This card was actually prettier than it looks in the photo as the green of the base card and slightly darker green dorsed area don't really show.
Right, now I shall get my local cards written and then I can enjoy my day out tomorrow. It's back to mince-pie making on Thursday!

Friday, November 30, 2012

A more traditional Christmas card, for Rudolph

Early this week I posted my rather unconventional Christmas card for the last Rudolph day on Sarn's Stamping for Pleasure blog. It was really interesting reading your comments. Thank you so much for taking the time to write them. One or two really liked my card but some of the others reminded me of my days of writing school reports when we were told we must write something 'contructive' about each child, when all you really wanted say was 'your son is a a pain in the butt!' Believe me, I had no illusions that everyone would like it.
However I did say at the time that I would be back later with a more traditional card, so here it is.


I made this using a purchased decoupage sheet. I bought two copies of it, and as they always have too many layers, especially for international posting, I managed to make three cards out the two sets.
I used three or four layers for each topper, and made a frame with nestabilities labels 23 and gold mirri card. The background is a flecked sandy coloured card and I made a rough hill-scape at the base using torn paper and pan pastels. The tiny Bethlehem stamp is by Art Impressions, but I am unsure about the make of the star, which needless to say, I have stamped a bit crooked!
Now I shall link this to Sarn's blog, make the last few inserts and then start on the card writing marathon.

Wednesday, November 28, 2012

WOYWW 182


I nearly didn't make it this week, and as you can see, there is nothing to show on my desk today except my new eBosser machine that I bought to replace my aging cuttlebug, (the jury is still out on how good an idea that was), and the wonderful stickles glue carousel that Julia showed us a week or so ago. It is a brilliant concept and mine is already full! The glass kitchen mat, I picked up at a table top sale last week to give me a firm layer when I am colouring, so I don't pick up all the cuts and bumps on my green mats.


I have to eat my words about the 'really use boxes' and storage company being slow to deliver. I received an e-mail within a few days of my order, to say the parcels were ready for collection by the courier, and even as I was just starting this post, a white van drew up outside, and they have arrived! The sad thing is that I have just too many dead-lines in this run up to Christmas, so they have had to go into the garage for a couple of weeks at least, before I can begin to think about sorting out my room.
My actual desk today was a table at my Wednesday group where I was asked to help with a group of ladies who were having an introduction to bobbin lace making. I kept an eye on these three, and between them they kept me busy all morning, but they were all doing well by the end of the session. They will need one more week to finish off their work. But look at the concentration on those faces!
This is what we were making. I actually did mine last week, in a pretty silver thread but it doesn't really show in the photo.


My afternoon work desk is in the kitchen table. I am in mince-pie mode now, with orders for sixty dozen so far, and that's rising! I started last Friday and had another session on Monday. I have done twenty-four dozen so far, and need to do a few more today. Then I have to get some of them wrapped up for a sale down in Mojacar tomorrow.


So now I will link this to the blog of our lovely hostess Julia, and this evening I will be back to visit as many of you as I can. But first I must do the mince-pies, and label some jars of jam and pickle for the morning.

Sunday, November 25, 2012

Something different for the last Rudolph Day

Well here we are at the last Rudolph Day of the year (the 25th of each month when Sarn invites us all to create a Christmas card and link it up on her site, Stamping for Pleasure). I decided to make something a little different for my last post - though I may come back with something a little more traditional in a day or two.


This week I read a post on one of my WOYWW friend's blog, where she mentioned that Delicious Doodles had a range of Alternative Christmas images, so I popped over to have a look. When I saw one I knew it was exactly right for one of my sons. I don't see the fascination with them myself, but he has several skull-related decorations on his clothes and around his house, and his partner is the same. So here is what I made.


I wasn't sure what to do with it, but having printed it on a white card, I then printed it again on some white starburst paper and cut the skulls out. Next I flipped the image and printed it again on the reverse of some black starburst paper so I could see to cut out the bones. I layered these onto the first image with silicone glue. It was a bit tricky because some layers went under one bit and over another, but it all went together fine.
This little close up shows the sparkle on the paper better than the main image does.
I wanted to add a touch of colour, so, as my son says red is acceptable on such images, I added tiny self adhesive, red gems as eyes, a red bow and a small red greeting in the centre. Then I layered the whole image onto some more black starburst paper, and then onto a square white base card. I made a frame from a narrow black peel-off, and a silver one that I coloured red with a permanent marker. 


It is not terribly festive is it? But I am happy with it because I know my son will love it. All my boys are 'special' to me, but even they would look at this and know exactly who it is for, so he will certainly know I made it 'Especially for him', so I am also linking it to Hazel's Christmas blog where the challenge is to make a card for someone special.

Wednesday, November 21, 2012

WOYWW 181

It's confession time. Each week, when Julia hosts our Wednesday hop around blogland to see what what our friends are getting up to, I always show my main desk, which is generally pretty tidy, if not empty, because any important project I am working on has to be stored away, out of range of my cat who lives in my craft room. Well the rest of my room doesn't match up to that, so just for this week I am swinging the camera round through 90º to show you the 'other bit'. Shocking isn't it?
The trouble is, that even when you have a room set aside just for crafting, you always end up with bits and pieces that have no home. You know you don't want to throw them away, but you don't know where to store them, so you put them on the side for later. Gradually the pile grows until you have a mess like mine! That area is a black hole. Things go into it and are never seen again. Every now and then I buy another set of little drawers to put some of it in, but they are very unsatisfactory. 


So watch this space, and one day in the not too distant future, it will all change. I have just ordered a lovely storage unit, filled with 'really useful boxes' in A4 and 12" x 12" sizes; hopefully enough of them to hold all of this and more. Two years ago my lovely other half bought me one of these units to hold all my papers and it is wonderful. I remember thinking then, that they were very slow at delivery, so I phoned them up and was told that it states very clearly on their site that delivery will take 28 days, so this time I am being very patient, and if I am lucky, the new unit will have arrived and been assembled, in time for me to have a good sort out in that quiet period just after Christmas, when there is no urgent craft to be done.


By the way, you probably can't see them very well in the photo, but on the right, immediately behind my little guillotine, there are two boxes filled with my stickles glitter glues. This is a useless way to store them, because they need to be upside down, so when I take one out to use, all the others keel over and I have to sort them all out again. So I was very impressed by the carousel that our lovely hostess Julia has been showing this week. I googled it and found one, so it is now on order, and that will be another storage problem sorted. Hopefully sometime fairly soon, I will be able to show off a corner transformed.

Wednesday, November 14, 2012

WOYWW 180

Once again I am writing this on Tuesday evening ready for tomorrow's world wide tour around other crafting folks' work spaces. You can find out why we do this on our lovely host, Julia's, Stamping Ground

This week there is not a great deal on my desk, but I am busy all the same. On the left side there is a pile a papers. I sing in a choir called Cantante (Spanish for singer) and we have our first winter concert in my local bar, because we are raising money for our village charity that helps the disadvantaged children in our area. I am looking forward to it as we are based at Huercal-Overa, some half hours drive from here, so it is nice to have one concert nearer to home, which my friends will be able to come to. So I took it upon myself to make the posters for the village. I showed them to our choir leader for approval at the practice this morning, and this afternoon I set about translating them so I could also display them in Spanish. I then had to seek out a friend from the village to check that  my Spanish was accurate and now I have printed out a few copies in each language, plus a lot of smaller ones to hand out to friends. So tonight I am having a guillotine session, so I can start handing them out at my sewing  group tomorrow.

When that is done I shall move to the other end of my desk where I have a few Christmas cards all waiting for inserts. I did a count up of my cards this week and found I still needed a couple of dozen or so, so I looked around for some fairly straight forward ones and got ten done yesterday. First of all I printed out four copies of a nice little Silent night sheet that I bought  from craftuprint. It has three layers of decoupage on the angels and crib, which was fairly easy to do, and then I used some ready made white base cards and some off cuts of patterned paper to mount them up.

I am pleaded with the 'Merry Christmas' ones. These used a cutting file for my Silhouette cameo machine by Tina Fitch, also purchased from craftuprint. As you can see, the inner layer is very fine and delicate, and when it is behaving, the machine can cut these very well. Yesterday it was temperamental, and I ruined a couple of sheets of paper before I got the settings right. It was then a game and a half to stick them onto the second layer. In the end I used diluted PVA glue and a very fine paint brush, and had kitchen roll ready to mop up any over flow! The third layer is mirri-card and I was impressed at how easily the machine cut this. Once the three layers were assembled and set under a press to dry, (My huge Spanish dictionary is just perfect for weighting down glued cards while they are drying!), I quickly put together a simple base. Because I was happy with the end results - the red/gold set, I then made another set using blue card and paper and silver mirri-card. It made sense to make three of each as I could fit three of each layer on an A4 sheet of paper.

Now I had better get on with that cutting up, or my cards still won't have inserts in them. I usually print my inserts but I need a new ink cartridge so I will have to stamp them tonight!
I will do my best to visit at least my regular group of friends tomorrow, and a few extras too I hope.

Wednesday, November 7, 2012

WOYWW 179

It is five minutes off being Wednesday here, so once again it is time to open up our little crafty corners for the world to see. If that sounds like an interesting idea, pop over to our host Julia's Stamping ground, and find out all about it.
It has been a funny old week here in Spain. A dramatic change in the weather has brought us wild and windy days, and some very wet ones. It is also several degrees colder and although around 18 degrees may not sound very cold to you, our houses are designed to be cool in the summer and they have few features that make them warm and cosy in the winter! We have no heating except a couple of mobile calor gas fires, and with bare stone floors, and ill fitting windows, it is often warmer outside than it is in doors. So our thoughts are turning to evenings spent in one room with a blanket round our knees and the TV on. That means I need something to do to stop me nodding off! Usually I do some knitting, but having made a very large number of jumpers and hats for the fish and chip babies of Africa this year, I decided to do something different. The man who has shipped our knitting to Uganda now has an imbalance of little jumpers in his store and he has asked us to turn our hands to making blankets.
Spanish wool is not at all like what we are used to, being rather harsh, and usually nearer to aran and chunky weight than double knitting. But fortunately I know an English lady in a town near here who imports British wool and she has  a small shop in a wooden 'shed' in her garden. Monday was one of her regular sale days so I popped over and stocked up on a good mixture of colours.
As I finished a run of cards this afternoon and then cleared everything away, there is no crafting on my desk tonight  so I thought I'd show you what I am working on instead. I have two blankets on the go. (I get bored doing a big project so I like some variety). First I have a selection of pale, bright and darker colours which I am using to make strips of Tunisian afghan crochet. I am changing the wool to make it look like squares of each colour.
It is years since I did Tunisian crochet but it is very easy, and grows quite quickly. I have lost my Tunisian crochet hook so I am making do with a broken one, but for these short rows, it is long enough. I like the texture of the work, and it will make a good, warm blanket.


For my second project I bought some pretty pastel wools. They remind me of a dish of sugared almonds. I am using these to make a Bavarian crochet afghan. This is a new skill, but I followed a basic pattern to learn the stitch, and now I am set to keep going. After the yellow there will be a white round and then back to the blue again and so on until it is the size I want. I am not sure how I will get on holding it when it is a bigger piece of work, but we have only been asked to make our blankets one metre square or slightly larger, so I should be able to manage that.

And finally I must share something very special for me. As you are aware, our five sons came out together to help us celebrate both our birthdays a couple of weeks ago. Our youngest son, Ben, is very musical, writing songs, singing and playing the piano, saxaphone and guitar. He only does it for pleasure but he often puts a video on you tube, so I can see what he is doing. I was expecting him to come over, so I had borrowed a piano so he could entertain us all at our party. But he then surprised us by singing a little song he had made up especially for us. Many of our party guests were like us, older ex-pats, and we all miss our families back home, and our friends were very taken by the way we have stuck together as a family, and when Ben sang, 'there wasn't a dry eye in the house'. This week Ben has sent me  what he called "a rough, live recording" of our song so I am sharing it with you here. After all it is not every week that you get a song written especially for you is it? Click on this link to hear it. There is a lot more of his music on youtube, and if you are interested you can find him under the name Zerendipity. He writes and sings a wide variety of music and also covers  other people's songs. This is a link to one of my favourite covers.

Thursday, November 1, 2012

Exploding Christmas card.

Today I have finished off the card that was a WIP on my desk in yesterday's post. It is a fairly simple Christmas card......


.......with a nice little surprise when you open it.


Sandra, over on Stamping for Pleasure, made a couple of these cards last week, and I asked her for some guidelines for folding the insert. She kindly did a very easy to follow tutorial which you can find here.

I decided to make mine for Christmas so I used a Chocolate Baroque ornate corner stamp and a very ancient Posh Impressions poinsettia stamp to decorate my square. I stamped some of the ink off onto scrap paper first as I didn't want the rather large image to be too dominating. The greeting is actually much clearer than it looks here.

For the cover I used a die-namics swirl die, and some Marianne dies to cut and assemble the flower corner. The backing paper is printed from a Crafter's Companion CD and edged with a Martha Stewart punch.

As I was quite happy with the finished card, I then cut out enough pieces to make another five flower corners. I have printed out sufficient backing paper so now I just have to stamp and fold another five inserts! I have done the first of these and this time I used a very fine, elegant Chocolate Baroque corner stamp, and two sets of Tapestry peg stamps. I used to enjoy using these but they haven't seen the light of days for a very long time. 

I think I prefer it to the large images, but I have crowded it a bit so I will spread the images out a little more next time. (Feel free to disagree with me. I am always open to suggestions!).

Right back to some stamping now. Thanks Sandra for your help.

Wednesday, October 31, 2012

WOYWW 178

My it has been a long time since I posted on here. I have had an amazing month starting with the storm which was the worst here for twenty five years, but which pales into insignificance when compared with what they are facing in America right now. Then there was a fantastic fortnight in Ireland, which, if you are up for a long story, you can read all about, and see photos of, on my other blog. Finally there was the week of family time when all five of our boys flew over to surprise us on our birthdays. They stayed for a week and we had a great time together. Since then all I have managed to do is sort out all the photos from each event, make folders of the better ones in my picaso gallery, and write posts about them on my blog.
Now it is time I did some crafting again so here is my desk as I start working  If Sandra sees this she will know what it is for as she kindly gave me a tutorial for it yesterday. But I'll post about it properly when the card is finished.  I am using two of my newer Memento ink pads, a lovely Chocolate Baroque corner stamp, and a very ancient Posh Impressions poinsettia stamp. The tatty sheet of paper at the side is for me to stamp off some of the ink as I only want quite a pale frame to my paper. At the back of my work is my new guillotine. I have just replaced my X-cut that I have had for years. It was such a good little cutter and didn't take up too much space on my desk, but I had had it for years and the blade was worn out. The old one was blue, and now it is pink, bu it seems to be just as efficient as its predecessor.
When Chocolate Baroque launched their new range of clear stamps last month, I was lucky enough to win one set in their draw, and I have since bought a second set, and a lovely Prima mask, so they are all sitting on my desk still in the hope that I will get the inspiration to use them .

To the left of my desk, above the 'messy corner', Arwen has taken up residence on top of my printer. This was always Baggins space in the winter, when it got too draughty to sit by the window, but now he is gone, she has taken it over. Arwen is Baggins mum, and she is very beautiful but sadly she doesn't have his lovely nature. She never leaves this room, by choice, as the door is always open, and she rather resents it when I want to sit here to use my computer or do some crafting. But I still like having her company.

Well I'm afraid I have done a long post again for Workdesk Wednesday, so if you have read down to here, Well done, and Thank you. I shall now link this to Julia's stamping ground, and tomorrow afternoon I shall visit you and see what you are working on this week.

Friday, October 26, 2012

Swinging back in for Rudolf day

Wow. It's a whole month since my last post. Did you miss me?
It has been a hectic time, starting with my cataract operation which was very successful. two more weeks and I can be tested for new glasses. I can't wait!

We were then hit by the worst storms in this area for 25 years. I know some of it was shown on TV in UK. We were just on the edge of the band that was hit the hardest, but our village was relatively unharmed, due mainly to the new flood drains installed a couple of years ago. But all around us there is debris, and devastation. We visited friends just half an hours drive from us on Tuesday, and in two places the main road had disappeared. It just stopped at a deep chasm with broken tarmac below. They have laid provisional diversions of compacted sand and gravel, but further rain is already churning these up. Even the main motorway was badly damaged so we have several stretches of contraflow in operation for some months to come. Many friends are still digging their way out of the mud and sludge that filled their homes and their cars. We were turned away four times when we tried to drive to the airport to collect our son the next day, but we did get there eventually and found him patiently drinking yet another cup of coffee in the cafe, and wondering where we were. There were no phone lines or mobile connections so we had been unable to contact him.

However, while he took care of our animals, we then had a fantastic fortnight travelling all around Ireland. It is a truly beautiful land and we met some lovely people there, enjoyed good food and loved the music. There is definitely a scrapbook waiting to happen there!
On our arrival home, way past midnight on Saturday 13th Oct, there was yet another surprise, as all five of our sons, and our eldest grandson,  had flown out to help us celebrate our birthdays, Chris's on the Monday and mine on the Wednesday. Apparently they had been planning it for eighteen months but we had no idea. We had a party already arranged for the Monday evening which was a great success, and then two boys had to go home on Tuesday, but the rest stayed until Saturday. (They are men now really but all together it was just like having a house full of kiddies again!). We had a fabulous week together, but as you can imagine there was little or no time for crafting.
Which brings us up to now. Yesterday being 25th October, it was once again Rudolf day over on Sandra's blog, and I had intended making a card for it when I got home form holiday. Of course it didn't get done, but yesterday was my monthly parchment craft class and this was our project for the day. So last night I mounted it up on red holographic card and then on a cream base card, and added a few gold brads and peel-offs, to make a simple card which I am now linking up to Sandra's Stamping for Pleasure.

It isn't that well done but at least I am getting to grips with the grid work now, and am fairly happy with the frame design. I just need to keep practising cutting the little crosses evenly. It is a very time consuming craft, but very rewarding when you get it right.

Now I have done that I will hopefully get back into the swing of crafting, as I still have quite a few Christmas cards to make.
I also have "quite a few" holiday photos to sort out. I will then be writing a post about our time in Ireland on my other blog, Kate's Adventures.  In the meantime you are welcome to pop over there to read more about the storms here,  and also about the great week we had with the boys.

Tuesday, September 25, 2012

It's Rudolf Day again.

Yes, the twenty-fifth has arrived with indecent haste so here is my offering for this month's Rudolf day challenge. If you are wondering what that is all about, pop over to see Sandra at Stamping for Pleasure, and you'll soon find out.

I had my long awaited cataract operation yesterday, so knowing I would not be up to doing much crafting this week I prepared this card in advance. I need to make a few more big sets so I tried to keep it fairly simple. Once again I have made a card that depicts what Christmas is really all about. I like making cards with robins, decorations and plenty of bling on, but really I like them to depict scenes from the nativity. So this time I've included them all, stable, kings, shepherds, angels, the whole caboodle! Every silhouette on this card is a dingbat from the font DB Nativity which I purchased from Scrap'n'fonts many moons ago. I used my Silhouette cameo machine to convert each letter into a cutting file, and then arranged as many of them as I could on an A4 sheet of paper. 
I then found that with just two sheets of black paper, and one tiny snippet that matched, I could cut out ten sets of my nativity scene. I had checked with the first one that the complete scene would fit on a DL card. So I went ahead and cut all ten sets out. I then found that the slightly sticky cutting mat made the tiny pieces stick together a bit, and the stables were getting in a tangle, so I separated each set out and bagged them up. So here they are, ten little cards just waiting to be assembled. Hopefully I will be able to do them in a day or two.

For today I settled on just one of them. I folded an A4 sheet of white card to form a DL base, and the piece I cut off I painted very 'loosely' with blue water-colour paint. I then distressed the lower edge with tea-dye DI to ground the characters. I stamped the base card top and bottom with two of the script border punches from a Hero arts set, and cut the painted panel to fit between them. I backed it with some silver holographic paper (Even nativity cards need a little bit of shine!), and glued it in place. Then I diluted some PVA glue so that it was easy to apply and painted it on the reverse of each tiny silhouette, and arranged them along the card. I may add a silver star over the stable. I haven't decided whether it needs it yet.
So one down and nine to go, but now I know what I am doing, it won't take long to finish the rest. The fiddly bit is done.
I am also linking this to Crazy Hazelnuts Christmas Challenge 91: Nativity.

Wednesday, September 19, 2012

WOYWW 172

Hi folks, I am popping in for quick post before I rush off to my Wednesday group. Hopefully we will be assembling our Christmas wreaths today. (I have done my homework!) Do visit Julia's Stamping ground if you would like to join me in visiting craft spaces around the world.


I haven't got a lot going on but I may well be missing for the next three weeks as I have my cataract operation next week, and then we are away for a two weeks break in Ireland, so I wanted to get involved this week. The week after that our son is visiting but I may be able to fit a little blog hopping around him.


This week I am trying to make a few men's birthday cards. A friend asked me to make one for her husband's 70th next month, but our holidays overlap so I haven't had a chance to discuss it with her. I thought I'd make a few and let her choose. There are enough men-folk in my family to use the rest on.
So here is my desk. I have covered the image I am working with at the minute, but as you can see, I am having a die-cutting session with my faithful green bug.
Just beyond the desk is my computer area and here I am setting up my Silhouette Cameo machine to cut out some small football characters. It is so good having everything in one room here. (Back in UK I had to go downstairs every time I wanted to use the computer, but I don't have to share it any more). I have a second monitor, stacked, (on a pile of house bricks!) above the laptop and they both show the same 'wallpaper' when not in use. It is a photo of Lake Negratin, near Baza, which I visited early this year. Isn't it beautiful? From another angle we could see snow on the mountain range behind it which was in some ways even more beautiful, but I like this view. I need to go back and see it at a different time of year.
Right. I'll just link this up and then I'm off out. I'll be back later to visit as many of you as I can.

Thursday, September 13, 2012

Batch "baking"

 I am really getting into the swing of "batch baking" my cards now. (Mum used to say that when she was doing a lot of something straight off). In a bid to up my stack of Christmas cards I made a run of eight (See earlier post), but I realised that wasn't good enough. So now I have really gone to town and made twenty. 


I recently bought a little angel stamp from Flourishes. I was ordering another plate and she just jumped into my basket along with it, so I thought I had better put her to good use. 
I used a Memento black ink pad to stamp her twenty times on a sheet of A4 card, and set this aside to dry thoroughly. Then I dug out one of my favourite backing papers. I've had it for ages, so it is probably from one of my cheap job lots from the QVC seconds shop. I duplicated it and used the colouriser in my graphics program to make it in several pale pastel shades. I then matched these to toning base card, and used copics to colour four angels to match each set. It makes sense to work in fours. Two A4 sheets of card, one A4 sheet of backing paper, and four images, makes four cards. (There are only two each of pink and turquoise because I ran out of ribbons in those colours. Otherwise I might have made twenty four!)


I split the BP and stamped a hero arts script in the gap, embossing this with either gold or silver powder. (I'm afraid this doesn't show very well in the photo). I chose the gold or silver depending on what ribbon I had in each colour. Some had gold threads in them and others had silver. I cut twenty strips of scalloped paper with my Silhouette Cameo machine and edged them again either with gold or silver and laid a strip of coordinating sticky ribbon down the centre of each one. Then it was just a case of layering everything up, and because some of the backing papers didn't stand out from the base card as much as I wanted them to,  I used a fine gold/silver peel off around each section. For a final touch of sparkle I covered all the angel wings with  crystal ice or silver ice stickles.


I printed out twenty inserts with a nice little verse about angels on one side, and an image using a dingbat, and a Bible verse on the other, glued these in place, added a 'handcrafted' sticker to the back and found each one an envelope, and there we have it. A set of twenty Christmas cards made in just a couple of evenings, and that really does make a difference to my tally.