Handicrafts by Kate Perry and other ramblings

Tuesday, November 25, 2014

New stamps for the last Rudolph Day this year

Yes, we really are at the last `25th of the month´ before the big one! How time does fly. For my last offering I am using two new LOTV stamps that I bought a while back and then didn´t get around to inking!
They are two cute little bearers of light, and I inked them up with Memento black ink and stamped them onto white paper. I made a mask for each and used ink dusters to shade a little tumbled glass and squeezed lemonade distress inks around them, and coloured them with copic markers. Then I found two suitable dies and cut them out. Both dies were also being used for the first time. I get excited when a parcel of new stash arrives, but then life gets in the way and there is no time to try them out.
The boy was cut with Go Create Frilly Squares#10, I really like its shape, and the girl with the largest of Just Rite Vintage Labels 8.
I sorted through my Christmas snippets box and found two pieces of backing paper. The green one was not wide enough so I used a little piece of red card to cut two spellbinders borders. Another piece of the red card made a mat for the die cut, and I removed the centre of this with a smaller die from the same set, and used it to stamp the sentiment which is one of my very oldest stamps by Stampendous.
For the little girl I cut a mat of pale blue card to go under the image and also one to go under the BP. Again I removed the centre and from it I cut the holly corner which is a file I made in my Silhouette program. I extended it at each end with parts of the file cut from the left over pieces of blue card. The berries are the holes cut from the borders on the first card! To finish this one off I stamped a circular sentiment by Hot off the Press, and cut it with a small circle die, and used it to cover the corner of my holly which did not cut very well. (I had to take this second photo in artificial light. The base card is actually white, as are some of the stripes in the BP).

It is unusual for not to add some sort of bling to Christmas cards, but I didn´t feel these slightly vintage style images needed it.
So I am off to link these up to Sarn´s blog for her last Rudolph Day. Next year she is passing the reins to Scrappy Mo, so why not make an early New Year´s resolution to come and join in the fun for 2015.
I am also linking up to Pixie´s Snippets Playground, as I used up lots of bits and pieces for these cards.
Brenda has suggested that I also enter these for the LOTV Christmas Challenge which is to make a Christmas card using one of their images, so I am off to link with them as well.

Tuesday, November 18, 2014

A dozen from one!

While browsing for something quite different I happened to find a set of dies by a company that I wasn´t familiar with at all, and I ordered one. The company was Taylored Expressions, and the die was a simple nativity scene. I have cut several elements from the Nativity using my Silhouette Cameo, but sometimes a die is quicker and simpler. When this one came I was really pleased with it, partly because of its size. It is small enough to fit on a A6 landscape card, and that is a real plus for me with the International postage. I also liked it because it covers all the elements of the story - the stable scene, plus a shepherd, the kings, camels and a donkey, and even a couple of palm trees, and I do like to see the Nativity on Christmas cards.
So I cut it from some black card and my first thought was, "this is going to be quite limited in what I can do with it". A backing paper and a sentiment and that´s it. Then I had a sharp word with myself and thought "Use your imagination Kate"! So I cut it out twelve times and set myself the task of making twelve different cards.

The first two are fairly basic with just different papers and different stamps. (Both stamps are from sets by Hero Arts).


Then I started riffling through my Christmas snippets box, and found some patterned papers and oddments of mirricard. I combined these with frames either die-cut or resized ones from my Silhouette library, and put together the next four. Apart from the one on the lower right side, these are a little larger than A6 which gave me more scope with the frames.
Out here the envelopes are European sizes and the standard one is a little larger than A6. I find that if I cut  a base card to fit these, I get a much more useful size to work in. (I don´t like making big A5 cards unless they are for a very special occasion). The down side of that is , I can only cut one from each A4 sheet of card, but sometimes I buy pads of card from Lidls when they have an art and craft week, and I can cut two base cards from one sheet of their card.
For the next four cards I used some embossing folders for the backgrounds on two, and stamped behind one of the others. The last one I finished off with some peel-offs that are so old I am surprised they would still stick! I also added some ancient sticky ribbon and a few gems. The backing paper for the top left one is from a 6" x 6" pad from Crafty Individuals and I liked the way  I could work around the angel so she showed in just the right place on it.
That left me with two more die-cuts, and I suddenly had the idea of splitting them up. For this one I put each section onto  a tiny snippet of blue paper and framed them to match the base card. Then I found a contrasting piece of paper to go behind them.

I didn´t like the empty corner so I found some clear stamps that I made for a project some years ago. I went through a phase of making clear polymer stamps with light-sensitive sachets. They were a bit hit and miss, but these ones were quite successful and I used them a lot. But now they are dried out and had curled up. So I used a glue stick to keep them on an acrylic block and held my breath while I stamped them. And they worked! A bit wonky but they worked. Then I added my tiny Art Impressions Bethlehem stamp below the kings.

I did something similar with the last die-cut only this time I turned the base card round and used it landscape again. I used mid green card that used to be a folder cover. I liked the shade of green it was but had never found a use for it. It probably isn´t acid free so is not suitable for a scrapbook title which I originally wanted it for, but that doesn´t matter for a card which has a shorter life. I then struggled to find suitable snippets for the little pieces. So instead I used one offcut for the back layer (Which is a much prettier green than it looks in the photo!) and before I glued it on, I printed a sentiment block in the top corner. Then I used a craft knife to cut empty, very narrow frames from the left-over green card. I sized them so that the nativity elements would just fit in them, and again I stamped the little Bethlehem in the empty area. It was a little dull so I lifted it with some sparkly sticky ribbon.

I have shown this card on its own so that I can link it to Crafty Hazelnut´s Christmas Challenge which is to use green and/or recycle (the green folder).
I am also linking up with Pixie´s Snippets Playground. Week 151.

Thank you with those who have stuck with me to the end of this rather lengthy post. I hope I have inspired some of you to look again at your dies and see how many different ways you can use them.

Wednesday, November 12, 2014

Designer papers for the Butterfly Challenge

For the latest Butterfly Challenge, as well showing butterflies, we are asked to use at least three different designer papers.

I had seen a card on Pinterest that inspired me, but unfortunately Pinterest is not playing tonight, (They say it is a problem at their end!), so I can´t show it to you. But I can show you my card, and here it is.

I rarely turn to my patterned paper snippets, but for this I looked through my blue and green boxes and came up with several pieces that are somewhere between the two. The swirly water one is a file I downloaded years ago, and at some time I experimented with changing its colour, and this must be one of the pieces I printed out. There was just enough left for these two squares. The peacock pattern is from a Joanna Sheen pack from way back, because she doesn´t ship paper internationally so I must have had it at least six years. The others are even older. When I was still working in the nursery I had one of the first home die-cutters, the old sizzix one that weighed a ton. At the time of buying it, I also bought about eight packs of A6 Sizzix papers of various types - leather look, thick hand-made papers etc, and two co-ordinating packs of printed papers and card. They were too small for many projects and I didn´t use them, but I couldn´t bring myself to discard them when I was packing to move out to Spain, and now I am starting to use them. The backing panel, blue check design, and dark filigree butterfly were all snippets from this pack. 

I´ve no idea where the foundation layer came from, except it was in the bottom of my snippets box, and while rummaging I found the piece that I used for the underneath layer of the butterfly. This was made using my original Starburst stains and the scrunched up copy paper technique, again it is a snippets from at least six years ago, because my sister and I played with these stains together before I left UK. It is really pretty and this close up shows the slight gold sheen that is on it.
The die is Butterfly Lace from Wild Rose Studio. The sentiment is cut with a Britannia die, and a few flat-back pearls were the only embellishments needed.
I was so pleased to use up some stash that has been around for so long. I can see me using this type of layout again soon, to use up some more.
Now I will link it up to Mrs A´s Butterfly Challenge #18; Use three designer papers, and also with Pixie´s Snippets Playground, Week 150.

Tuesday, November 11, 2014

Another Christmas card session

I am well aware that I will need my cards for UK to be written and ready to send in a few weeks time. We have  a few Red days, Spanish bank holidays, to come before Christmas, so I like to get my overseas cards out of the way before the Post office closes, and mail starts to stock-pile. (I might add that I got my first C. card in the post this week!!) However, those of you who read my previous post will know that I have been busy making items for my craft table, and I have another one to prepare for soon, so I haven´t made many cards recently. I was thinking of a quick idea when I remembered some downloaded files I have on my computer that have never been used. 

Occasionally when I am looking for inspiration, or when I want a particular cutting file, I browse the site craftsuprint. I don´t use them often because many of their designs are too elaborate for me, and some leave very little scope for me to ´make them my own´. But if I see a design that really catches my eye, I do buy it and it is there in my files if I ever need it. So I went through my collection of Christmas files and chose a few to make. 

I printed most of them out a couple of times, and then assembled some as given.


Some I changed the colour scheme to one I liked better. (The mats and ribbon were pink in the original for the one below, but I preferred the green).
Many of them are layered either as a whole image, or decoupaged. Some I printed out again so I could add more layers. In the blue one, the twined ribbon in the frame is an extra layer. In the red one it is not. I am not sure it was worth the fiddle to do it.

I don´t often do cute, but I liked these little penguins. There are five layers on this card.
Some I just used the toppers with my own choice of base cards and backing papers. I used a Martha Stewart Punch-around-the-page punch to make the frame. I don´t usually go for pink at Christmas, but this one turned out to be my favourite, with the penguins a close second! The BP is from a Dovecraft 6"x 6" pad called Christmas Blues.


I thought my great-grandson might like this jolly Santa. There was a lot of cutting out and careful assembling needed, but I might try it again a little bigger.

Of course I added some bling to all of them, with ribbons, glitter glue and peel-offs and I ended up with a pile of a dozen or so cards, which are a useful addition to my collection. 


Thursday, November 6, 2014

Jack of all trades......

......Master of none, as my mum used to say. And that just about sums me up right now.
I apologise to friends whom I haven´t visited recently. There are several reasons. 1) I don´t ´do´halloween, and nearly every blog  I see has had a halloween card on it recently so I don´t open them. (It´s a personal thing and no offense intended). 2). I have lost my Bloglovin´feed right now and have been too busy to reset it. I managed to mess up my brand new computer with a lot of unwanted downloads, and my long-suffering hubby had to sort it out, but a lot of my bookmarks disappeared on the way. So I have missed some posts, but next week I should be back on track. 3) And finally, I have been very busy making lots of bits and pieces, at the last minute as usual, for a craft table at a coffee morning for my church, which was today. It was at a friends house, and she gets quite a crowd there, so I was keen to have something to show them.
This might be a rather long post, but I´ve added lots of photos so I hope you won´t be bored. So here are the sort of things I made.
Christmas decorations:
Baubles.

The top two are large glass baubles that a friend brought back from UK for me. The images are cut from vinyl and adhered to a clear plastic circle of acetate, which is then curled up and pushed inside the bauble where it, hopefully springs open and stays in place. I find that if I cut the circle to fit exactly and leave a small tag on it to go in the neck, this works quite well. A little snow is added on each side of the image and the cap is replaced and glued on. Then they just need a hanging loop and a bow.

The bottom row are smaller plastic baubles which open into two halves. I poured acrylic medium inside them and drained it out again, and then added glitter and mica powder until they were covered. I left them to dry overnight and then sealed them back together. I cut the word Rejoice, and some snowflakes, from metallic vinyl and stuck these on the outside, and again added a hanging loop and a bow. Because they are small, the surface is very curved and it is difficult to make the lettering lay completely flat, but with a bit of patience it is possible! I made these in a variety of colours and they looked really pretty.
To cut the vinyl I first make the design on the computer and adjust it to the exact size I want. Then I divide it up into the different colours,  and place little pieces of the vinyl where I want them to cut. Because the mat has a grid on it, which I can reproduce on the computer screen, I am able to place the vinyl in just the right place. So the mat starts off looking like the top of this picture, and if I am lucky, after it is cut, and the unwanted pieces are weeded out, I end up with the lower picture. Well I was nearly lucky. The more observant of you will have noticed that I lost the first ´O´ from the black lettering, so that had to be cut again, and the silver piece moved while the tiny stars were cutting, so that had to be scrapped and redone. But on the whole that was quite good.
Lace decorations:
I crocheted these just because I saw the pattern on the internet and wanted to  give them a go.
A friend had given me some fine cotton and I wanted her to know that I had used some of it. I chose the ivory one for the bells. They were not too difficult but very fiddly for my fingers! When they were made I dipped them in liquid starch, and pulled them over a ping-pong ball wrapped in cling film and left them hanging freely overnight to dry. Then I sewed a bell to the chain I had made inside them, and added some gold glitter glue around them and a bow at the top. For speed, to add all the bows I dug out my hot glue gun which I hadn´t used since I came out here. I needed more glue sticks, and when I went to buy them, I could only buy a kilo bag, so I have enough glue sticks now to last a lifetime! The angel was a very last minute affair as I only finished her at midnight last night. So I dipped her in the starch and shaped her skirt, and while she was still very wet I added silver glitter glue, and hung her up to dry. Fortunately, this morning she was dry enough to add to my bag.
Paper decorations.
This is not my idea at all. I saw it on Pinterest and traced it back to source. There was a link to the music paper and the central image as free downloads, and a video tutorial, so I copied it because I thought it was a lovely idea, and a bit different from the usual. Again I used the hot glue gun to assemble it, and a few burnt fingers and lots of glue strings reminded me why I had hidden the gun away. But it is fast and efficient, so I must practice being more careful with it! I did add some glitter to the little girl´s fur trim, and a big double bow at the top because even vintage decorations need a bit of bling for me.

Apart from decorations I knitted these which I showed on my other blog a couple of weeks back. Each one covers a Ferrero Rocher chocolate. I later made the rest of the set so all the box of chocolates were covered, and they sold well. I would make these again. They are so cute.

Then I had a few more knitted and crocheted items such as this little patchwork puppy, and the crocheted basket containing pot pourri. Again this was a pattern I wanted to try. It is called crocodile stitch, and I think it is rather
attractive.
Here are some more things made with vinyl, cut on my silhouette Cameo. 
Plates:
The top two are large gold plates that I bought in a charity shop, and the lower pair are very small glass candle plates. Again it was fun designing them and sizing them just right. It doesn´t help that I am now used to working in centimetres, but the machine is American so the grid on the mat is in inches! So I have to have my sensible hat on when I am doing this. I was pleased with the plates and they all sold.
Candles:
The Spanish do not decorate in the same way as we do for Christmas, but they do like their candles. At this time of year there are shelves and shelves of them in the todo shops. I bought a few plain white ones in non-flamable plastic sleeves, and I decorated them. This was another idea I saw on the internet, and it used a special craft film that I had to send to America for. It is very thin, on a paper backing, and it is ink-jet printable. So I used Photoshop and some digi scrapbook collections, to design covers that would fit around my candles. Here is one of them.
Once printed they had to sit overnight to dry completely. Then you peel off the backing, being careful not to stretch the film, spray adhesive all over the item to be covered, and lay the film ink side down onto the glue. This one was rather pale once it was on the candle, so I did some more with much darker designs. Then I added some shiny ribbon top and bottom, and used glitter glue to highlight the images. As the candles burn down they will glow through the design and should look quite pretty. I do like to have a go at new techniques and materials even if I only do them once!
Calendars: Also using Photoshop and a selection of photos that I have taken around the area over the passed year or two, I designed the pages for a calendar. I used a purchased calendar kit, because it saves the tiresome bit of aligning the dates etc as it is done for you. In the kit there were also additional elements that I matched to some of my photos. If there wasn´t a suitable one, I found something from a different kit. Here is one of the pages as an example. I used a zutter bind-it-all to put it together. I only made three (plus the first two that needed some tweaking, so I kept one for my own use and sent the other to my sister Jean), because they are fairly expensive to print and I didn´t want to waste them. But folk liked them, especially because they has Spanish places on them. Usually we can only buy them from UK with English scenes on. I sold the three I took and got orders to make seven more.

From Kate´s Kitchen:
Of course, no craft table of mine would be complete without a range of jams and pickles, and at this time of year, mincepies. So one end of my table was food and the other was all the rest. I only had a little space but I managed, and I took 125€ which is very good for a little coffee morning, so it was worth it.
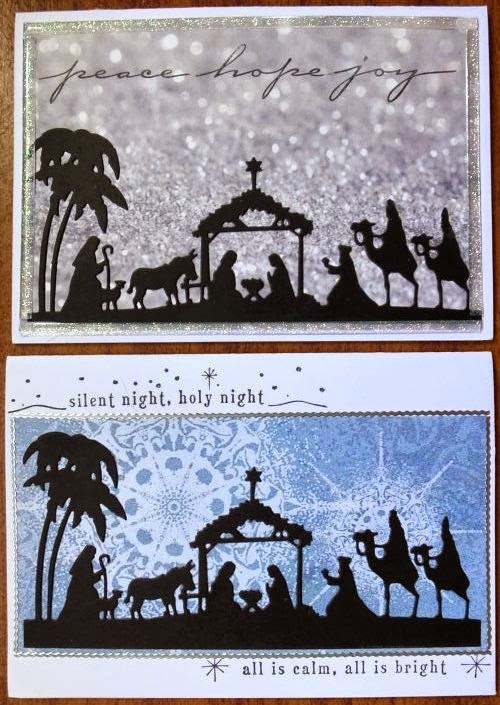
Well done to anyone who is still with me. I´ll be back soon with some cards I managed to put together along with this motley selection, but I promise it will be a much shorted post.
Making these gave me the opportunity to use up lots of scraps of vinyl, paper, felt, ribbon and wool, so I shall link up over at the Snippets Playground, as I haven´t had time to play for a while.